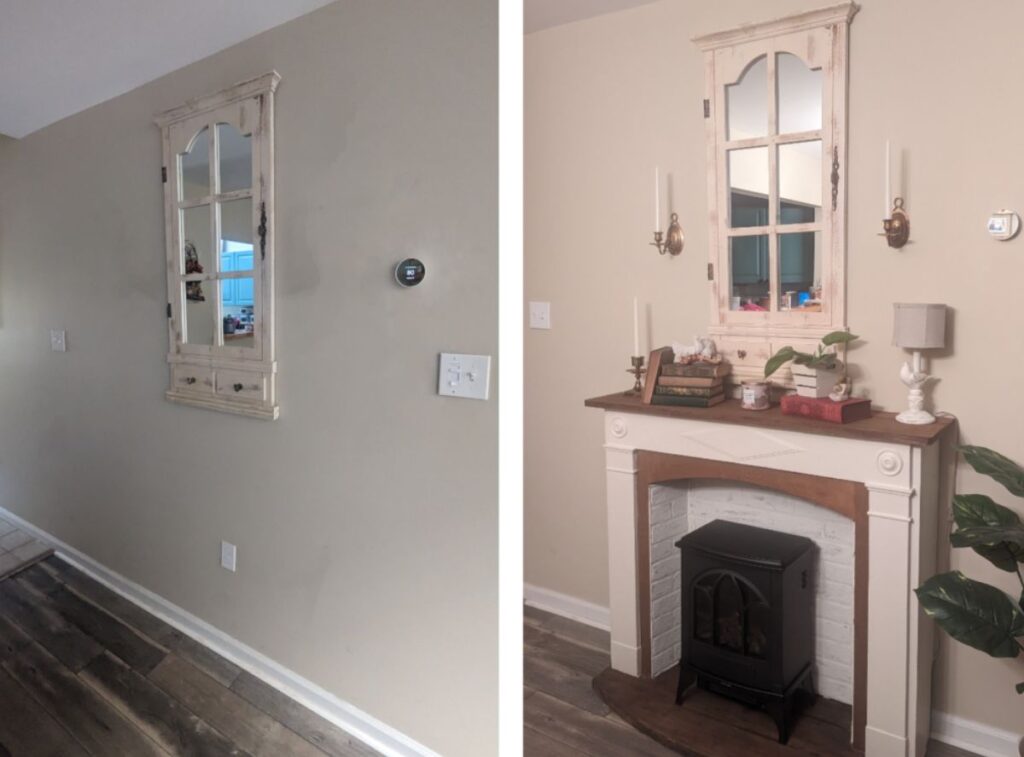
The addition of a DIY fireplace is a timeless way to add a focal piece to your home that can be made to fit any aesthetic. And with so many electric options today, a beautiful piece can be added to any room without the hassle of costly construction. Read on to see how we turned a blank wall in our dining room into the most inviting DIY fireplace for less than $350.
Any hygge lover knows that a fireplace or wood-burning stove is the most essential element to creating that cozy atmosphere in a home. A hearth or fireplace, at one time, was the only way to heat a home before modern ways of heating became the norm, so every home had at least one, at least in colder climates. And it was the main gathering place where families would come together in the evenings to eat, drink, talk, tell stories and spend time together in the glow and warmth.
The most recent available information shows less than half of single family homes in 2018 included fireplaces in the U.S. according to NAHB tabulation of recently released data from the Survey of Construction (produced by the U.S. Census Bureau with partial funding from HUD). This means that there’s a good chance that your home doesn’t have one or maybe like ours it does, but you just want one in every room! Here are the steps we took to make our DIY fireplace dreams come true!
Step 1: Sourcing a Surround
A fireplace surround is just that- the part that surrounds the fireplace. This usually includes the mantle across the top. Now if you’re envisioning something very specific and perhaps more modern looking, then building a surround (or having one built for you) might be the way to go. But if you like browsing antique and consignment shops and aren’t afraid of a little DIY restoration, then thrifting a surround is an inexpensive way to get a beautiful piece into your home.
This is precisely what we did, which meant that patience had to be involved because we didn’t find our perfect piece right away. I scoured Facebook Marketplace for months and visited all my local antique shops but nothing fit quite right. Until that day in September when we walked into a consignment shop in Beacon, New York.
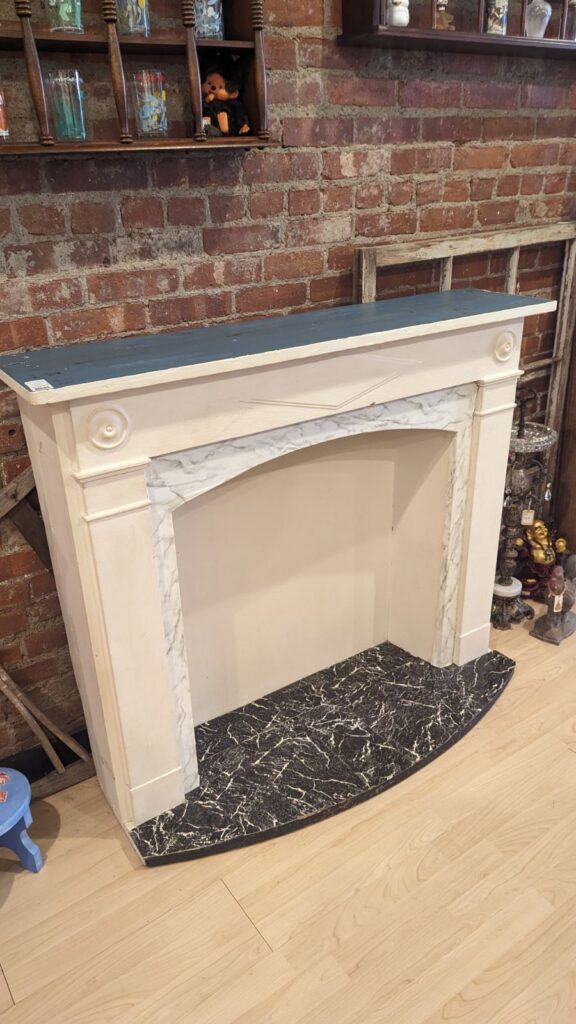
It was one of two surrounds in the shop and as my husband stared at it while I perused the rest of the shop I knew he had ideas. As I looked closer I could see it needed some TLC. It wasn’t exactly our style but it was easy to see that the parts we didn’t like about it could be easily changed. And, if after peeling off layers of paint, peel and stick linoleum, and contact paper, the original wood was still intact- it would be exactly what we’ve been looking for. So we made the purchase that after tax cost $150. (Luckily, we found the original receipt of purchase taped to the back of the surround which told us it was hand-built at a shop in New York City in 1920!)
Step 2: Strip and Sand the Surround
Once we got it home, the next steps were pulling up the linoleum flooring and peeling off the marble contact paper. This took just a few minutes. My husband slathered on a paint stripping gel (he used two different brands but liked the Citristrip brand the best). This part took the longest. We repeatedly had to slather on layers of stripper and peel up paint until all the layers were off. It took about 2 days before we were able to get down to the wood. It seemed like at least 6 or 7 layers of paint on the mantel.
Once we were down to the wood, it was time to scrape and sand the entire fireplace. My husband used a belt sander to really get the wood to look its best and for the smaller detailed areas he used a sanding sponge which you can get at any home improvement store.
Step 3: Brick Inlay
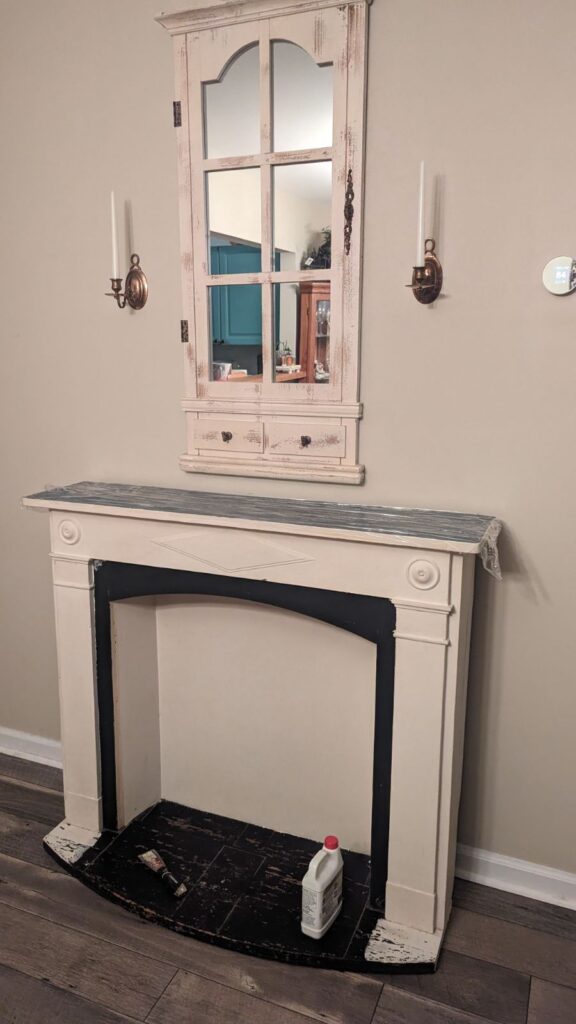
The inside of this fireplace was just wood. We wanted a more authentic look and we were considering doing brick pavers like we did on our real fireplace in our living room. The only thing is it’s a bit costly and labor intensive and we were eager to use the german smear technique on the brick anyway. So we opted for a faux brick panel. For $43 at Home Depot, we got an 8ft by 4ft brick panel and my husband cut 3 pieces to perfectly fit inside the fireplace. It looked great but there is no confusing brick paneling for real brick. Leaving a 100 year old surround with the brick paneling would be basically the same as covering up that beautiful wood with linoleum. You’ll see how we remedied this in step 4!
Step 4: Stain and Paint
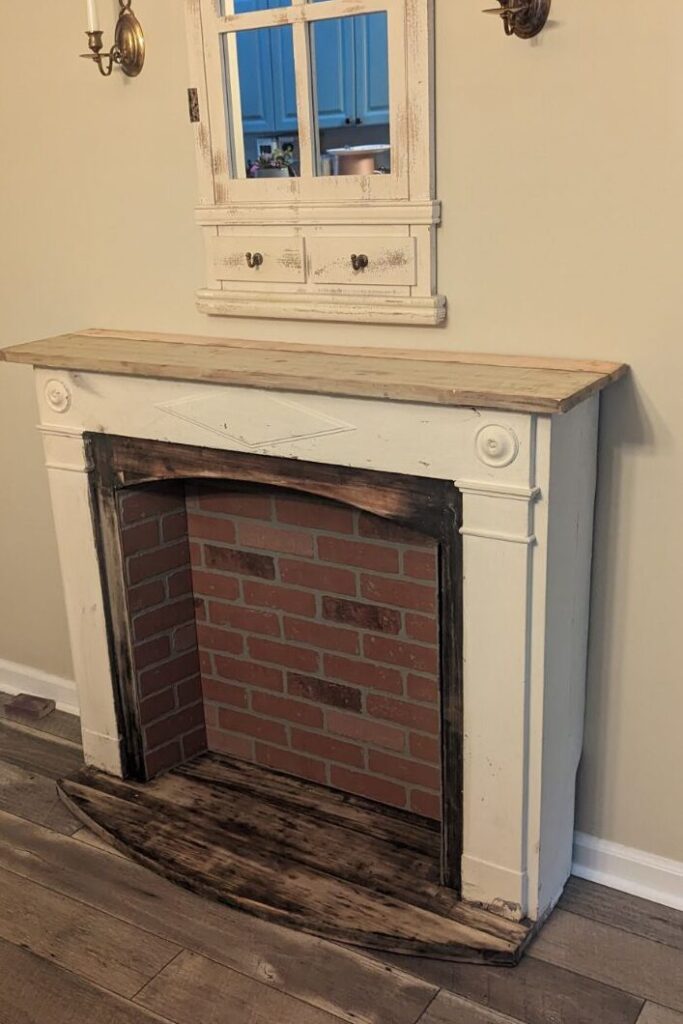
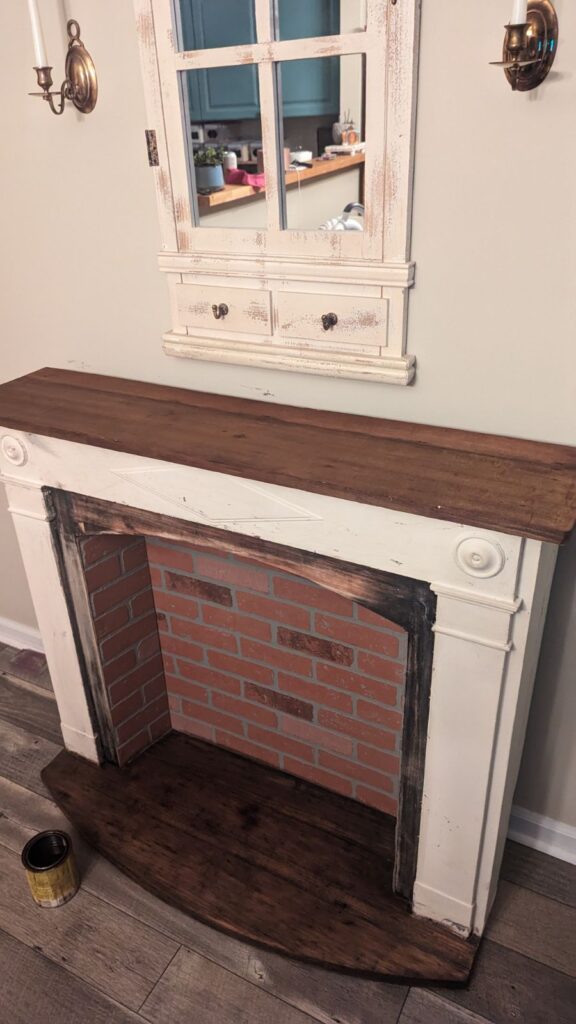
Once the brick inlay was done we decided to stain the wood before painting the rest of the fireplace. We used Varathane pre-stain wood conditioner to get the wood ready for staining. You don’t have to condition the wood but I recommend this step because the stain will soak in more evenly. After the wood was conditioned, we used Varathane English Chestnut Wood Stain to stain both the mantel and the floor. My husband used a clean rag to apply the stain but you can also use a paint brush, it’s really just a matter of preference. Once the wood was all stained, it was time to cover the wood and paint the rest. We mixed a couple of paints we had in the house to make a warm off white that we liked for the surround and in the very inner face of the surround we used a Rustoleum Hammered Copper paint.
Step 5: The German Smear!
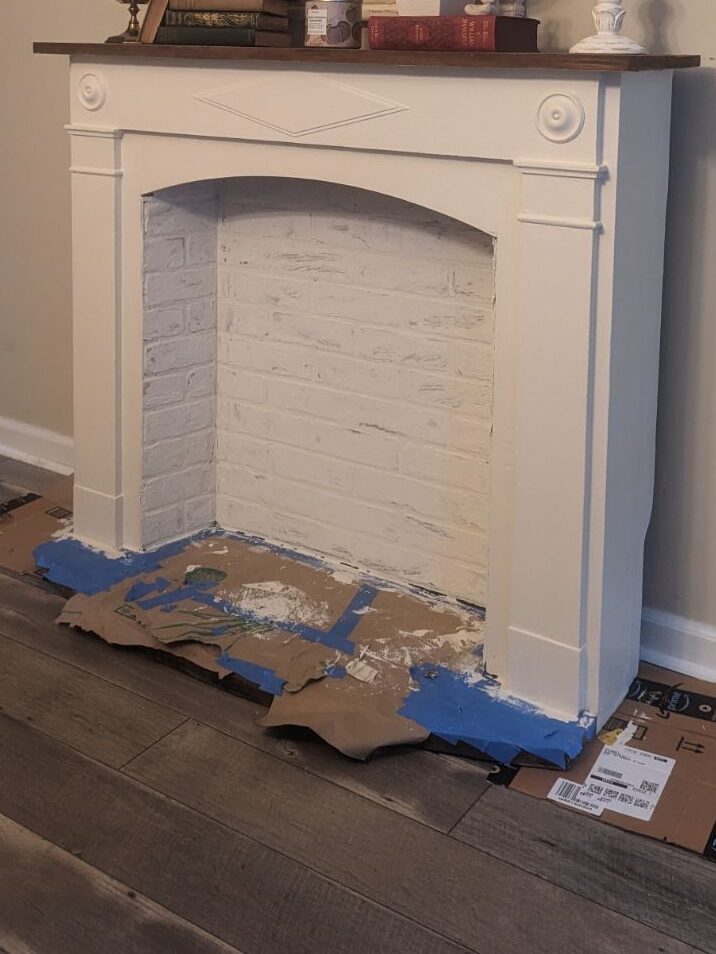
For those unfamiliar, the german smear is a technique used to cover brick. It’s similar to white washing but with this technique, you have more control over how much or how little of the brick shows through. So basically we used a white VersaBond Thinset Mortar to cover the brick paneling and then used a trowel to scrape some off. The end result could very easily be confused with real brick and it came out exactly how we wanted.
Step 6: Decorate!
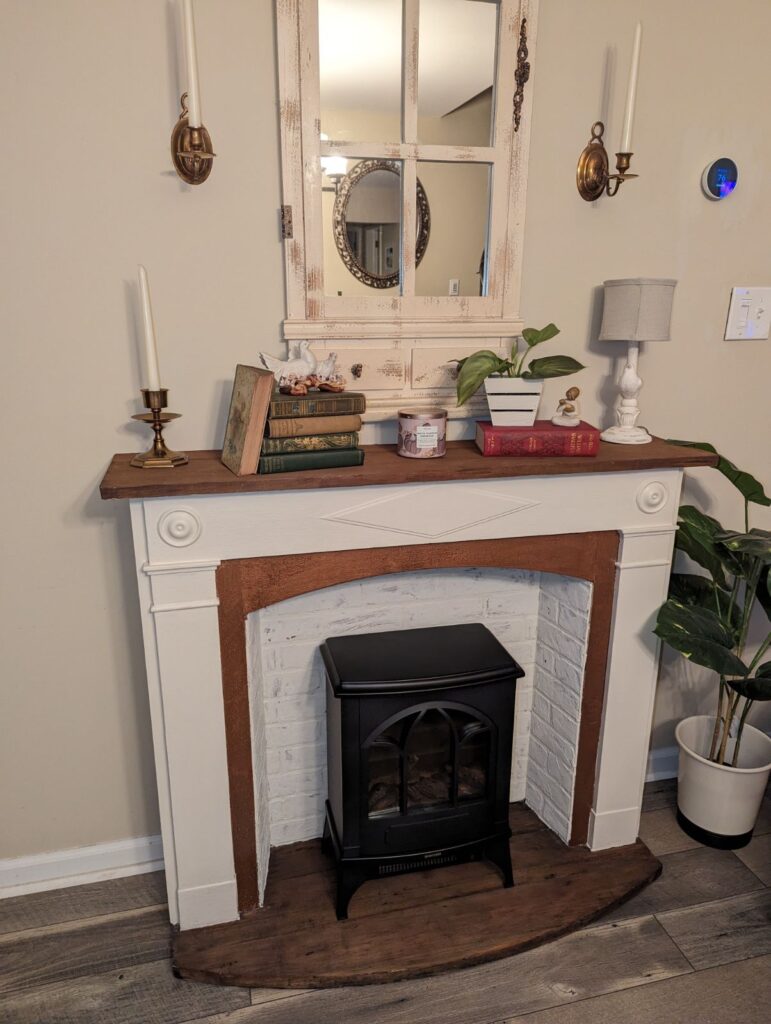
Here is the funnest part of creating a DIY fireplace! What you do next is totally up to you. There are so many options. We opted to source an electric wood burning style stove for the inside of the fireplace. My husband just used a small hole saw to drill a hole big enough for the cord to be threaded through and plugged in behind the fireplace and then I added some decorative elements that fit my home’s vintage asethetic. This took a surprisingly short 3 days to all come together. What we ended up with looks like it has always been there, it’s easily one of our favorite features of our home now.
What we had already:
- All of the paint
- All of the mantel and wall decor
- The belt sander
- The wood conditioner
- The wood stain
What We Purchased:
- The fireplace surround- $150
- The brick panel- $43.98
- The electric stove (facebook marketplace)- $50
- Versabond mortar- $21.27
DIY Fireplace Grand Total: $265

